Monday, 13 April 2015

Outlook 2010 - Migrate Autocomplete Settings


outlook autocomplete
The autocomplete/autosuggest file remembers your previously typed email addresses.
The good news is that you can still migrate the settings, only now you need to migrate a .dat file instead.

Solution

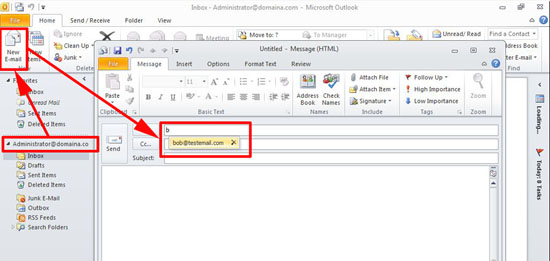
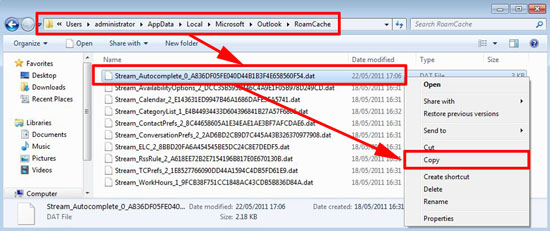
1. In this example I'll migrate the autocomplete from one user to another user (though in most cases the source and target user will be the same). From the administrator user (above) you will see there's an autocomplete entry for bob@testmail.com. On the SOURCE machine navigate to the following location:
The file we are looking for is called:
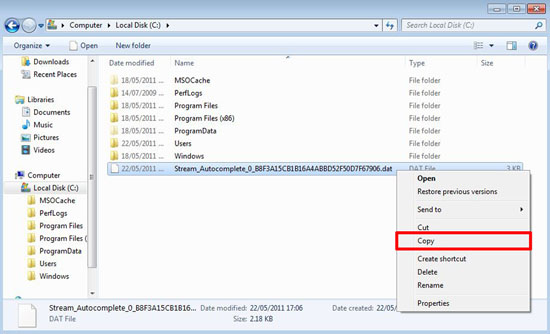
Right click the file in question and copy it.
stream autocomplete
2. Copy this file to the TARGET machine.
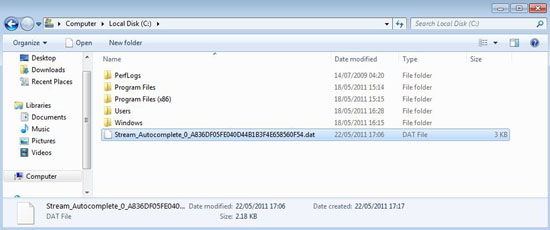
autocomplete lile location
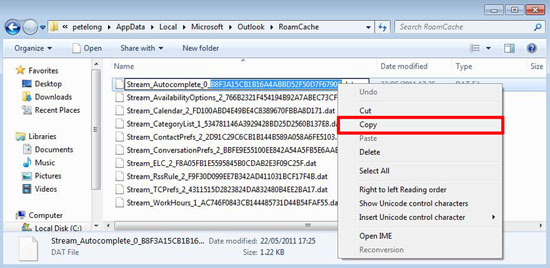
3. Once again on the target machine navigate to the same location. Note: If there is no stream_autocomplete file you may need to send at least one email form the target outlook profile and restart Outlook. Once you have located the target autocomplete file, right click it, select rename, and copy the long number/letter string from it's name.
stream_autocomplete
4. Return to the file you copied from the old profile, right click > rename > and paste in the long string of letters and numbers you copied (so this file now has the SAME NAME as the target file).
migrate autocomplete from outlook
5. Copy the renamed file.
Migrate Outlook Settings
6. Paste the file into the target directory, and when prompted select copy and replace.
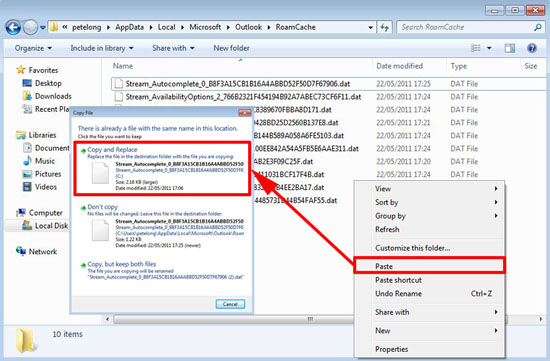
email address migration for outlook
7. Now the new account has all the autocomplete settings from the original one.
nk2 file

Install and Configure Microsoft Lync 2010


Solution

Note: The following procedure is carried out on Server 2008 R2 with Windows 7 Clients, on my VMware test network.

Walkthrough

I know a lot of people don't like watching videos so heres my notes:

Pre-Requisites

1. Download and install, Microsoft Silverlight. (link)


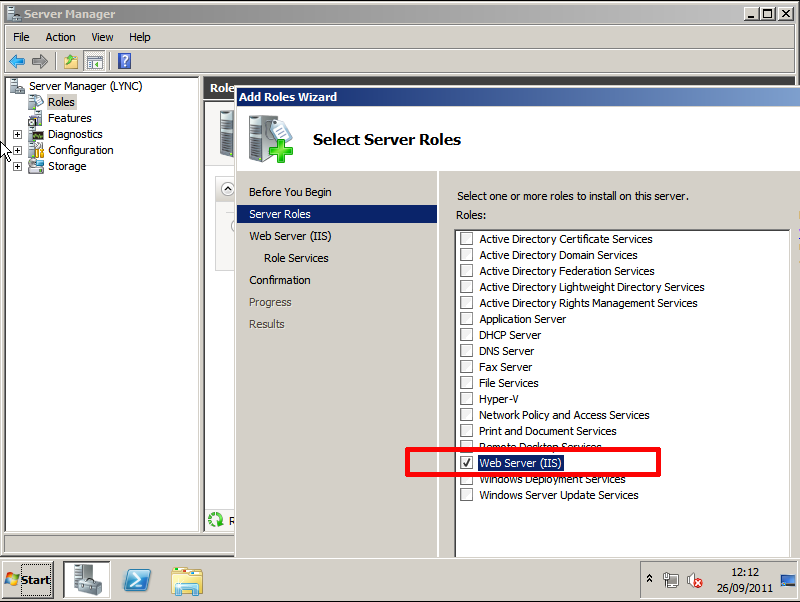
2. IIS (Roles > Add Roles > Web Server IIS) > Next.

install iis

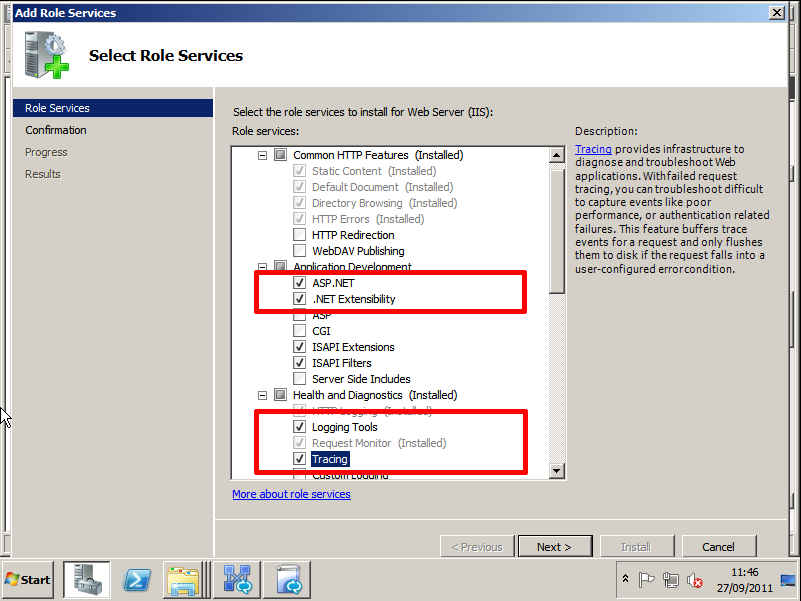
Also add:

i. ASP.NET
ii. Logging Tools
iii. Tracing
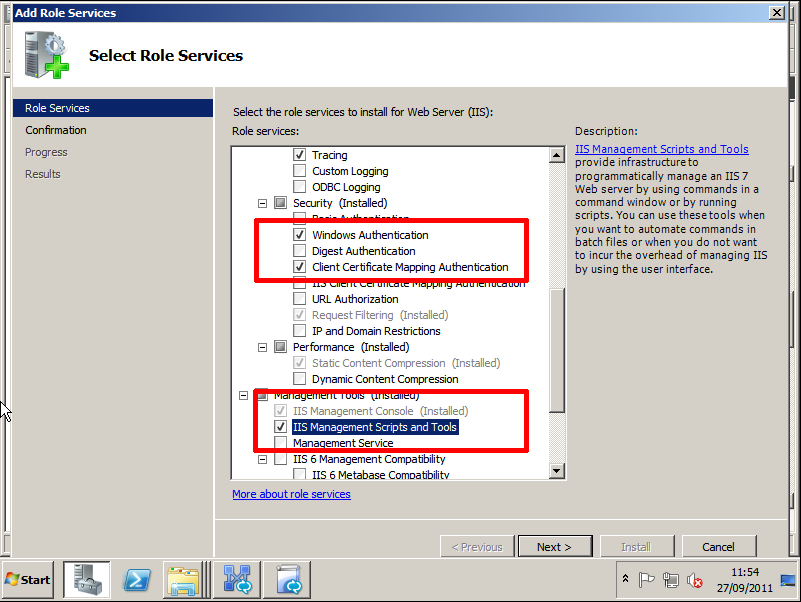
iv. Client Certificate Mapping Authentication.
v. Windows Authentication
vi. IIS Management Scripts and Tools

install role services

install role services

Next > Install > Finish.


3. RSAT Tools (Features > Add Features > Remote Server Administrative Tools > AD DS and LDS Tools) > Next > Install > Close > Select Yes to Reboot > Post Reboot Installation will continue > Close.
RSAT Tools


4. Have a Certification authority set up in your domain. OR a certificate ready for the Lync Server to import.
 

Install

1. Run Setup > It will ask to Install C++ let it do so.
2. Once it's finished, It will ask for the install location > change if required > Install.
3. Accept the EULA > OK.
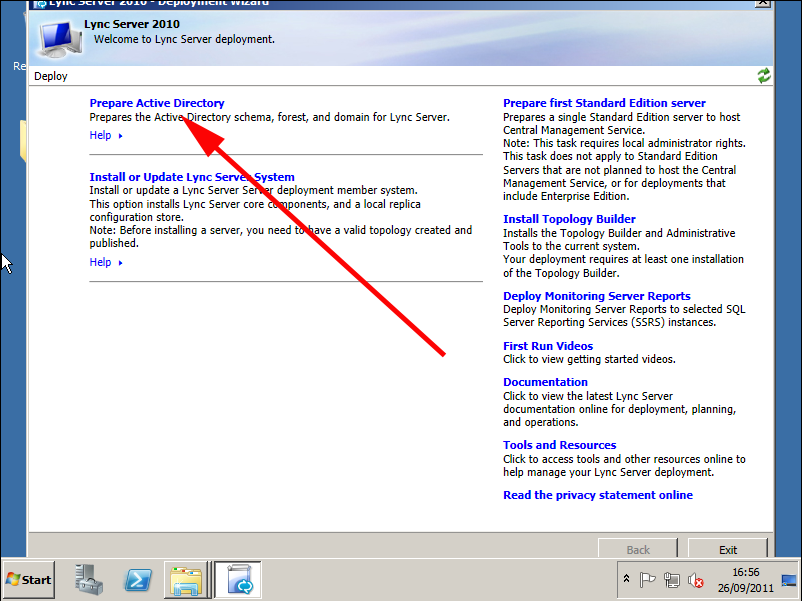
4. When the Deployment Wizard starts > Select "Prepare Active Directory".

lync prepare ad


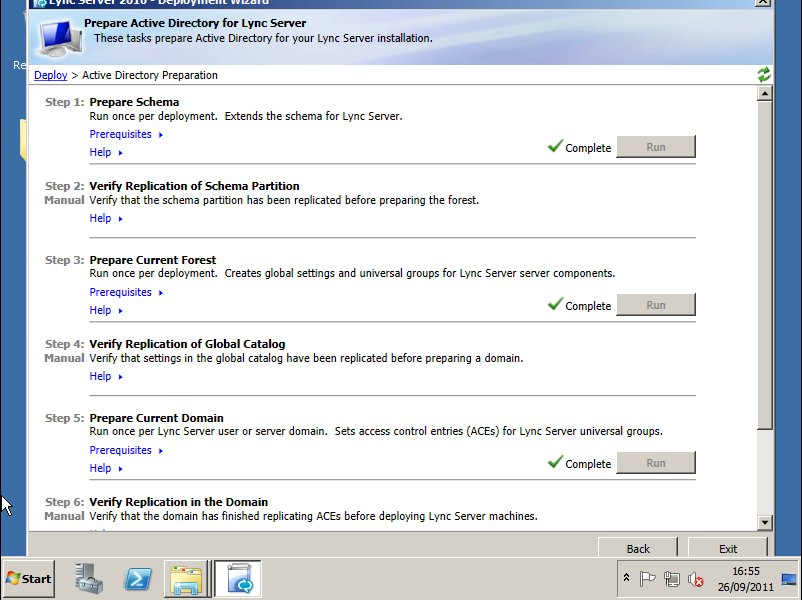
5. Prepare Schema > Run > Next > Finish.
6. Allow domain replication.
7. Prepare Current Forest > Run > Select Local Domain > Next > Finish.
8. Allow domain replication.
9. Prepare Domain > Run > Next > Finish.

lync prepare schema


10. When all are completed, add your administrators to the newly created AD group CSAdministrators > Then click "Back" to return to the main page of the Deployment Wizard.

csadministrator group


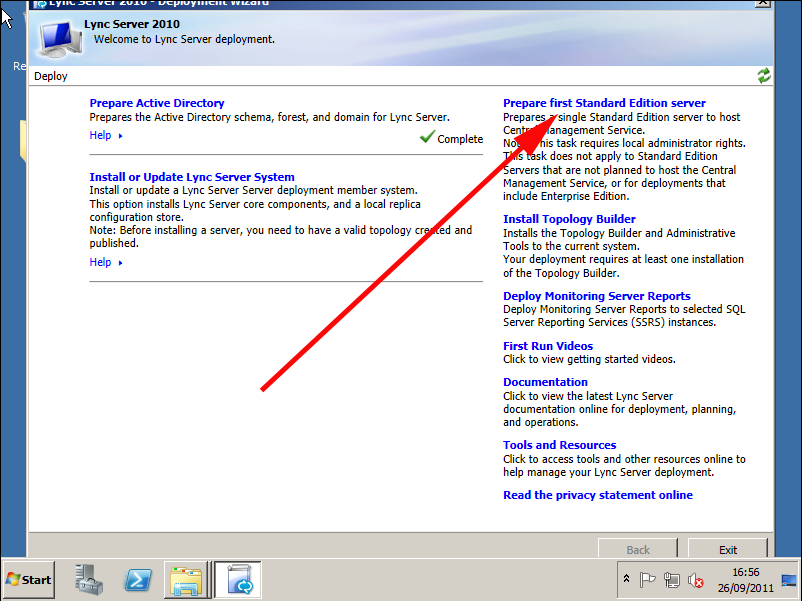
11. Prepare First Standard Edition Server > Next > SQL Express will install > Finish.

Lync prepare server


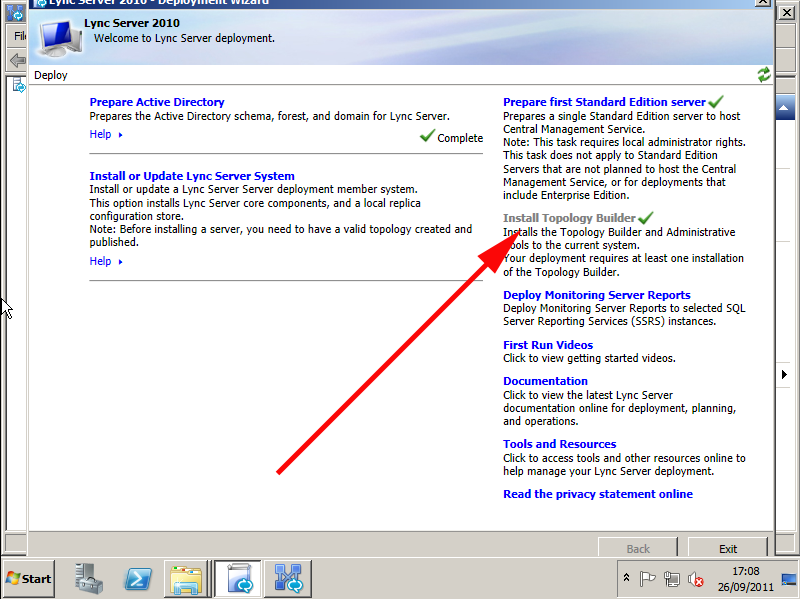
12. Install Topology Builder > It installs very quickly and gets a green tick when complete.

Lync Topology Builder


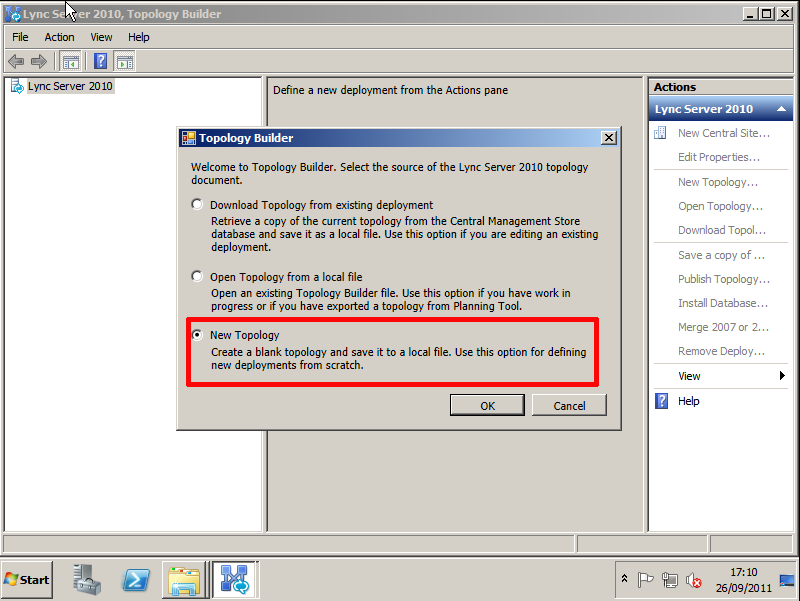
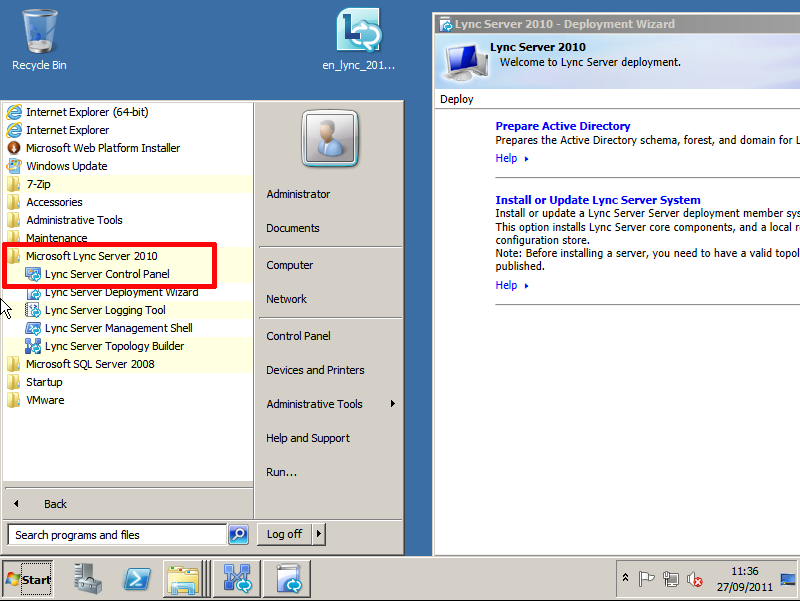
13. Start > All Programs > Microsoft Lync Server 2010 > Lync Server Topology builder > When promoted select > New Topology > OK.

Lync New Topology


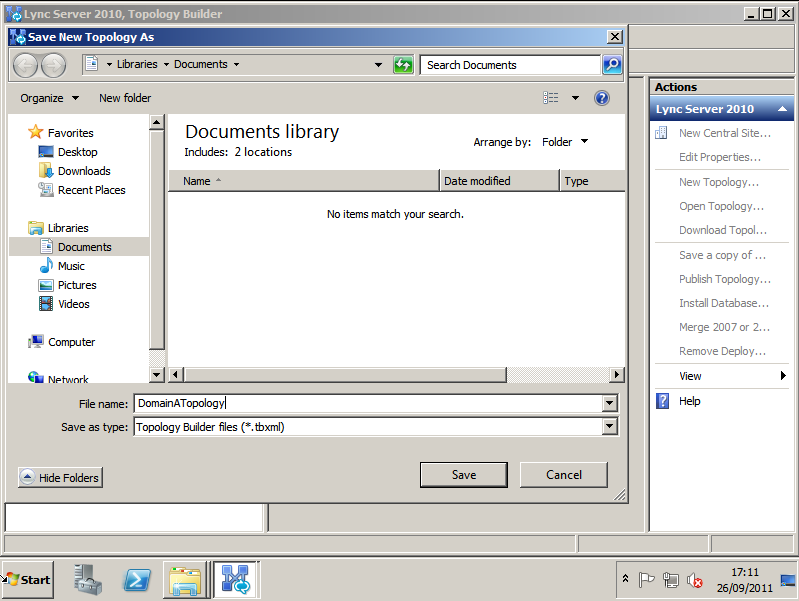
14. Save the topology as requested.

Save Topology


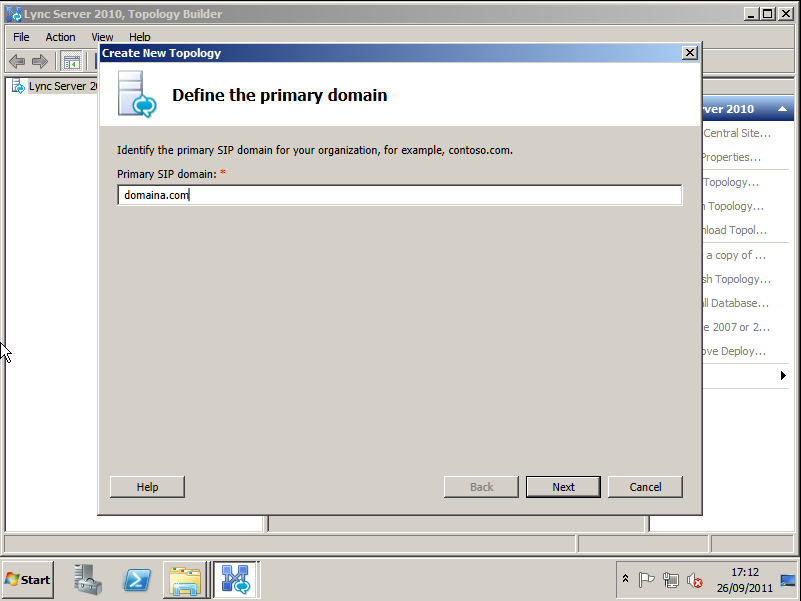
15. Under "Primary SIP Domain" > enter your domain name > Next.

SIP Domain Name


16. Enter any additional domains if required > Next.

11. Give the site a name and description > Next.

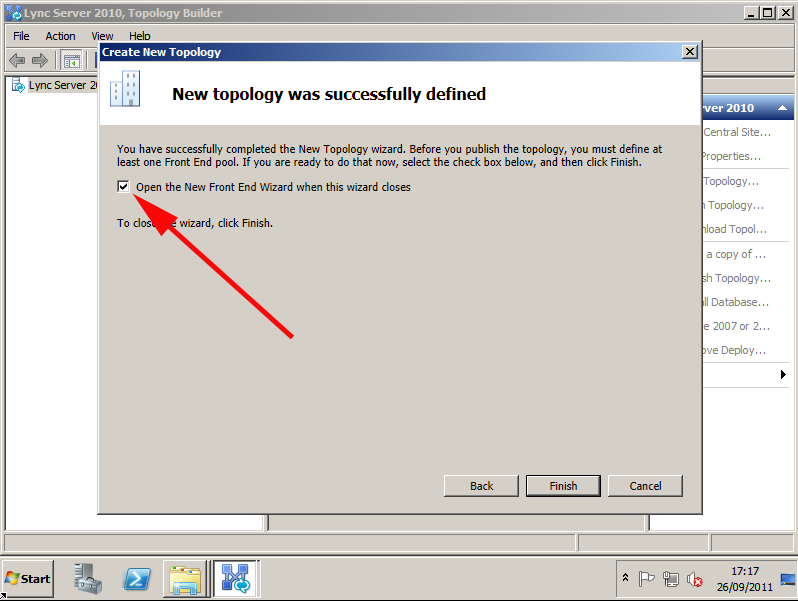
12. Enter site details > Next > With the option to "Open the new front end wizard.." selected > Finish.

Lync Toplology


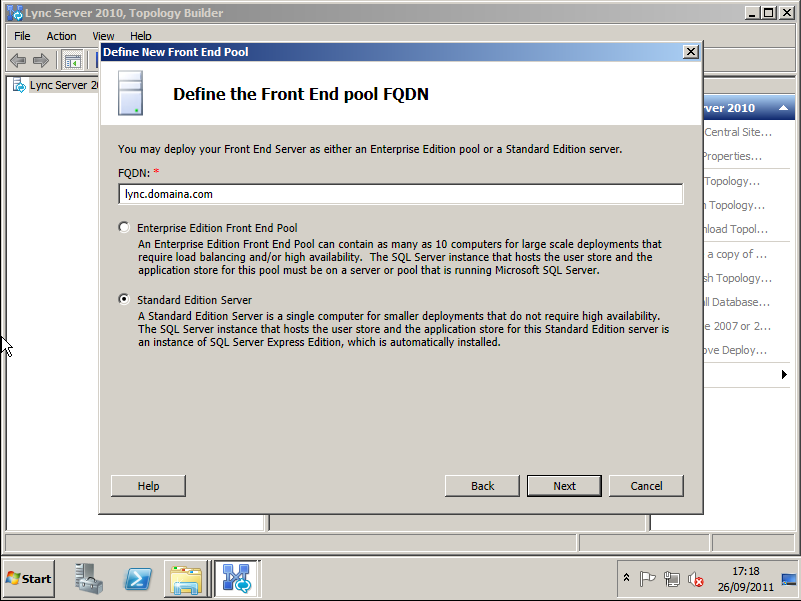
13. At the "Define a new front end pool" wizard > Next > Enter the FQDN of the server and select Standard Edition > Next.

Lync Front End Pool

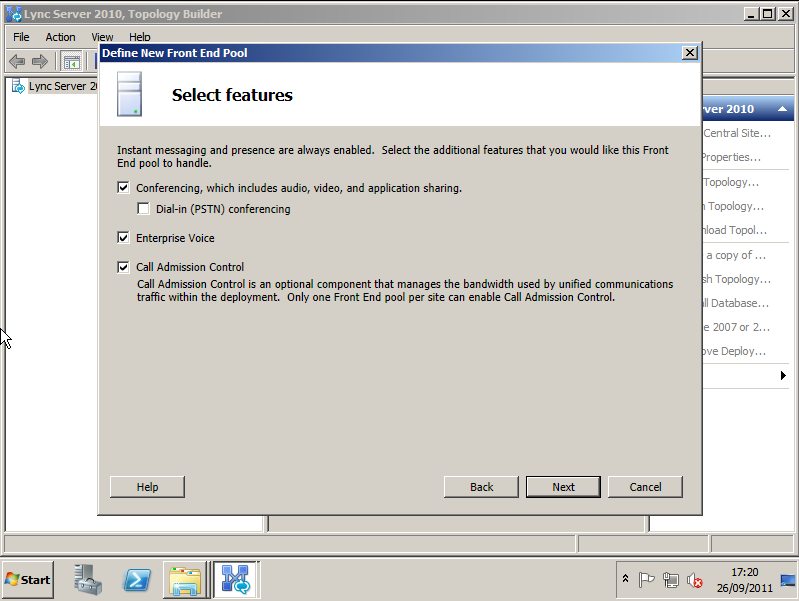
14. Select features (Everything except PSTN, because I don't have a PSTN gateway) > Next.

Lync Features

15. Choose to Collocate Mediation Server > Next.
16. Don't add any further server roles > Next > Next.
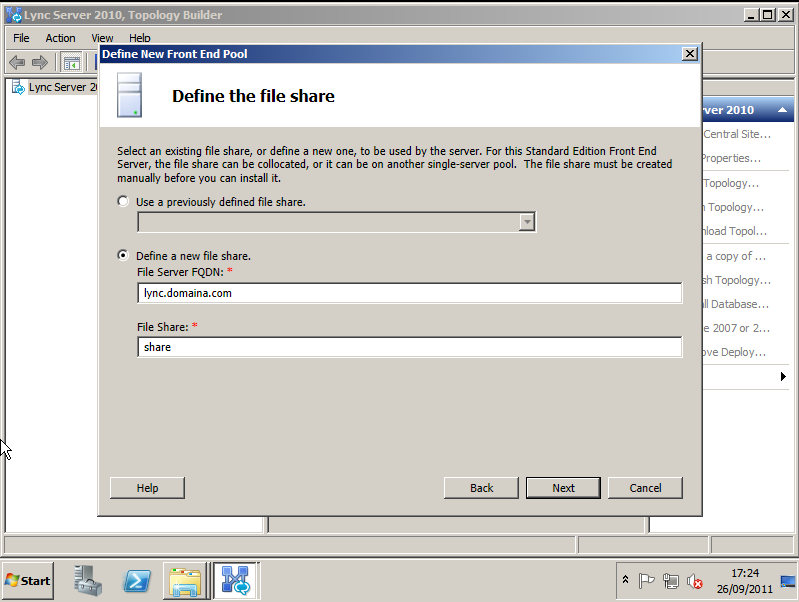
17. Let it create a new share > Next.
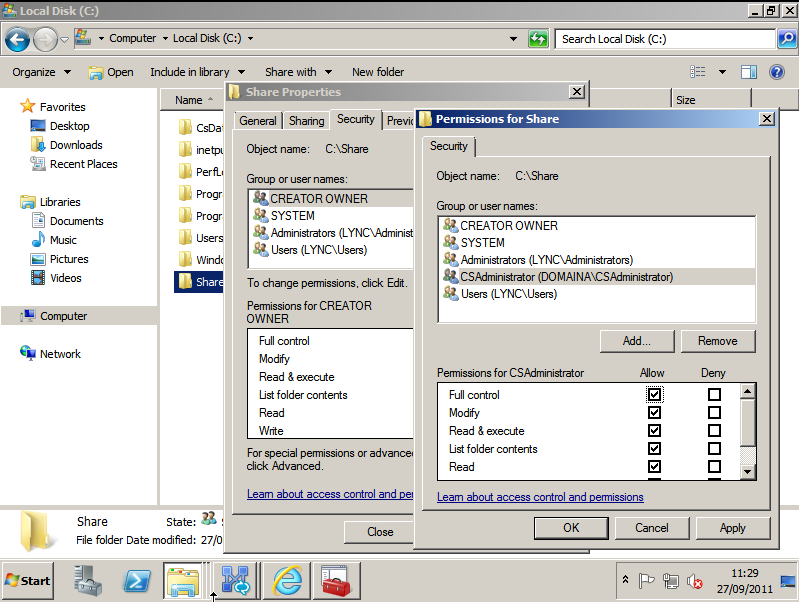
(Note manually create the share and make sure it has appropriate permissions).

Lync Share

Create share

18. Set external URL if required > Next > we are not adding PSTN > Finish.
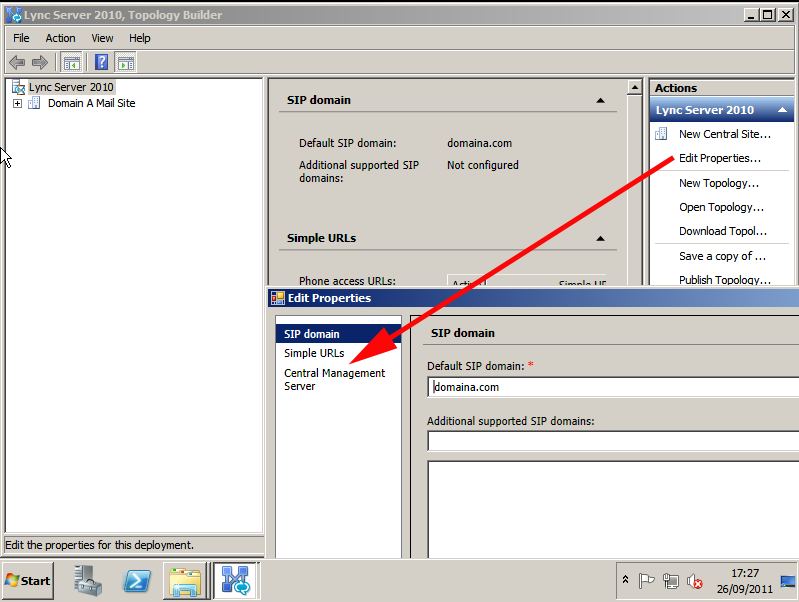
19. On the Topology Builder Select > Edit Properties > Central Management Server.

Lync Edit Properties

20. Add in the admin URL (Note: Make sure this resolves in DNS), and FQDN of the server > OK.

Lync CMS URL

21. Select Publish Topology > Next > Next > Finish.

Lync Publish Topology

22. Re-launch or swap back to the Lync Server Deployment Wizard > Select Install or Update Lync Server System.

Install or update Lync

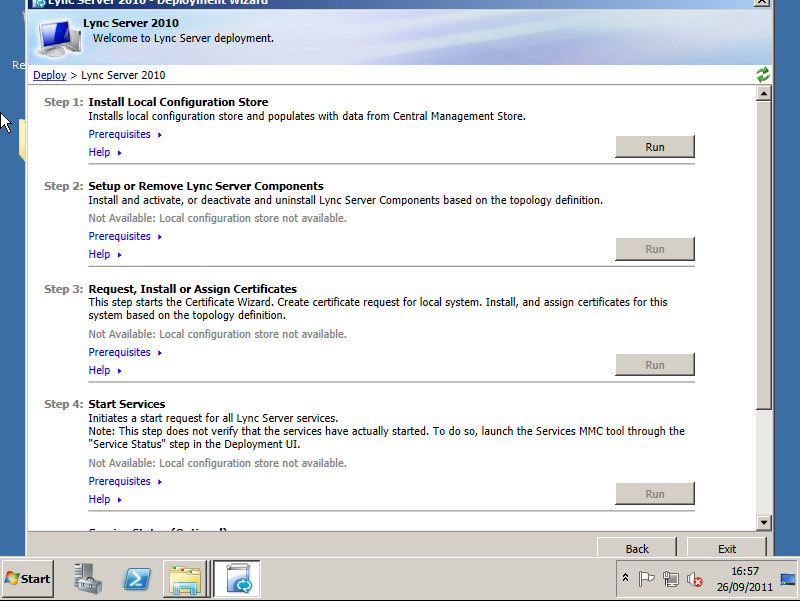
24. Run step one "Install Local Configuration Store" > Select "Retrieve directly..." > Next > Finish.

Lync Deployment

25. Run Step two "Setup or Remove Lync Server Components" > Next > (If you get a Prerequisite installation failed: Wmf2008R2 click the link) > Finish.
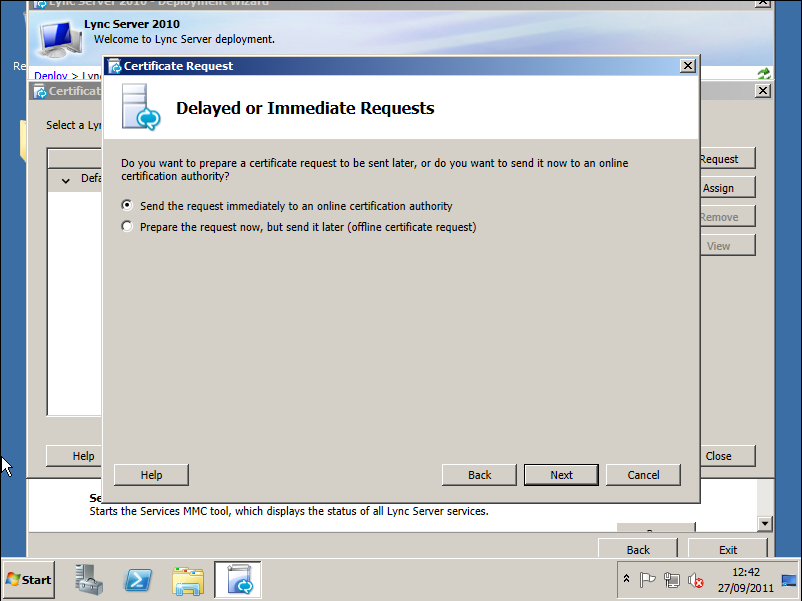
26. Run Step three "Request, Install, or Assign Certificates" > Request > Next > Send request immediately > Next.

Lync Local CA

27. Select your CA > Next > Next > Next.
28. Choose a friendly Name > Next.

Certfiicate Friendly Name

29. Fill in your Organisation information > Next > Enter country > State and City > Next > Next > Next > Next > Next > Next > Finish. > Close.
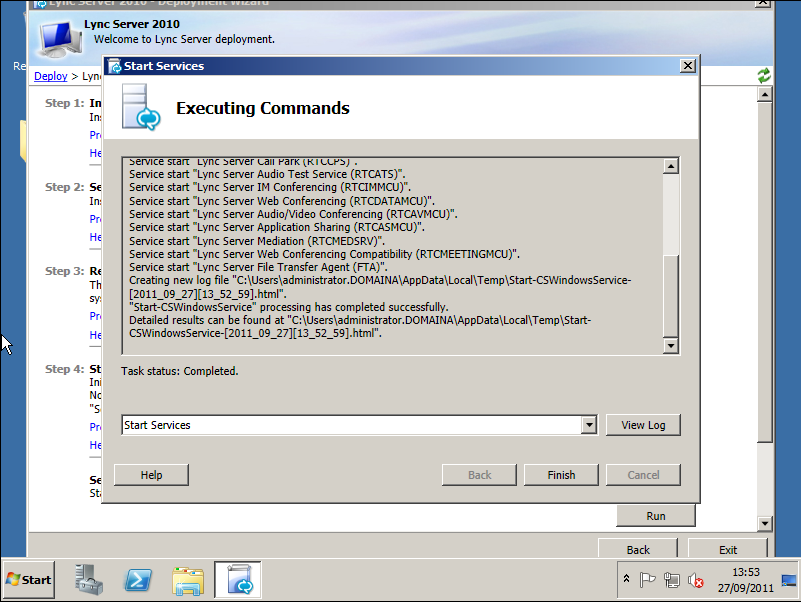
30. Run Step 4 "Start Services" > Next > Finish.

Lync Delpoy

31. Check the service status if you wish.
32. Close the deployment wizard.

Launch "Lync Server control Panel" and Configure

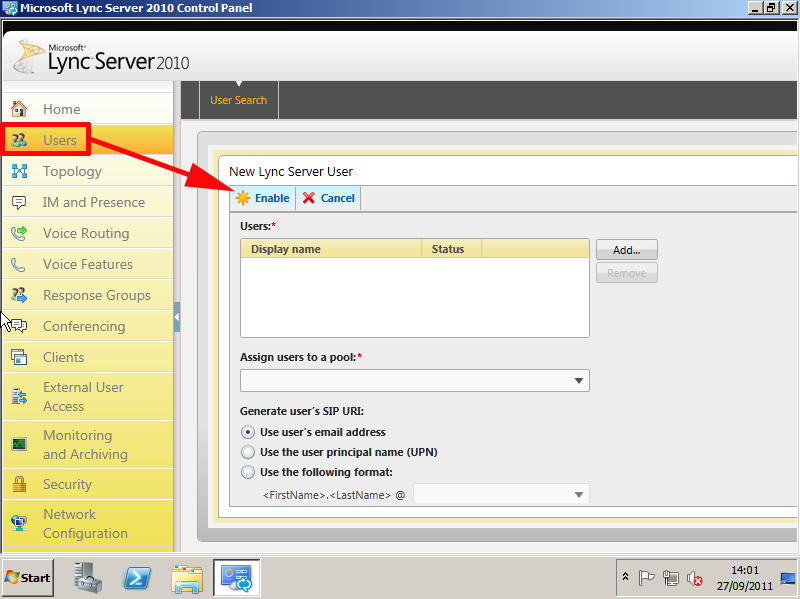
1. Launch the " Lync Server Control Panel" > Log in with an admin account (created above at step 10).

Lync Server Control Panel

2. Navigate to Users > Add.

Lync Enable Users

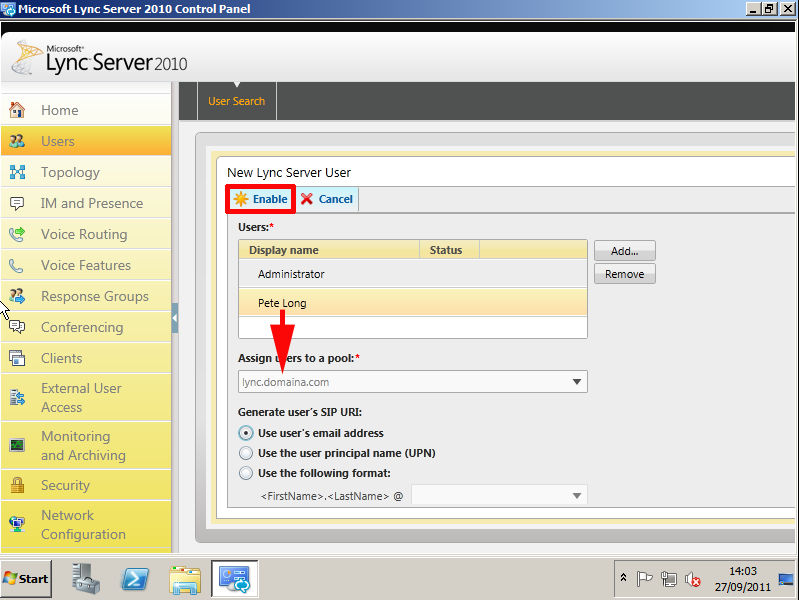
3. Add in your users and assign them to your pool.

Lync Assign Users to Pool

Lync Pc-to-PC-only

Post Install Tasks

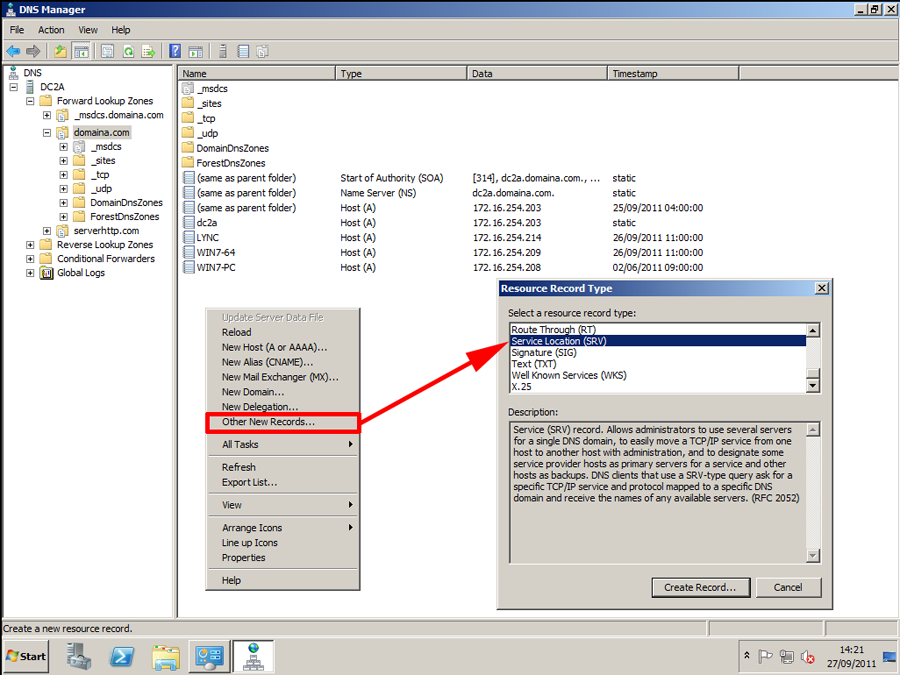
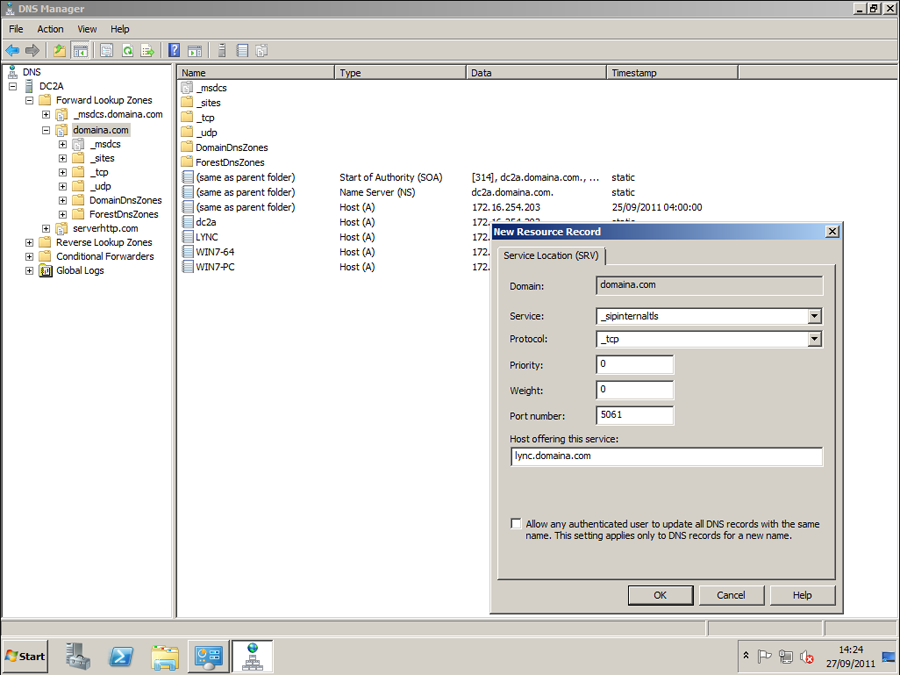
1. You need to create a DNS SRV (Service Location) so the client can locate the Lync server:

DNS Create SRV

i. service: _sipintenaltls
ii. Protocol: _tcp
iii. Port Number: 5061
iv. Host offering service: the FQDN of the Lync Server.

Port 5061

Install the 'Lync Client' on the client machines.

Lync Client


Active Directory - Modify all users in an OU to "Password Never Expires"


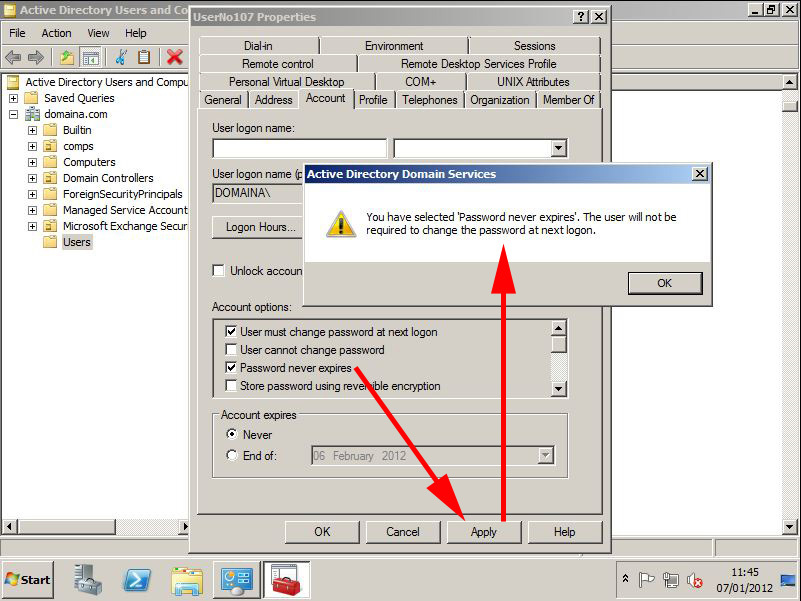
change password at next logon
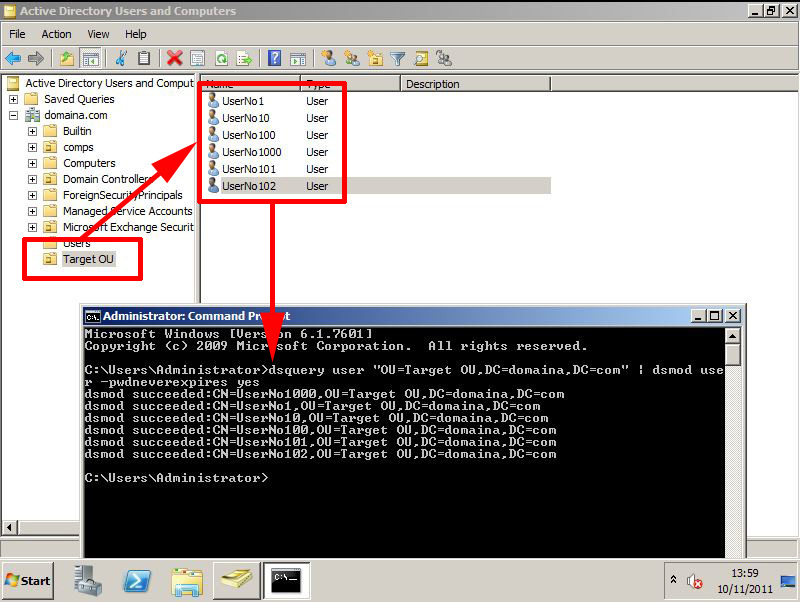
1. However - If your users do not have this ticked then you can set this option on an entire OU by executing the following command;
dsquery user "OU={your target OU},DC={your domain},DC={your domain extension}" | dsmod user -pwdneverexpires yes
Update: Note: If your OU has more than 100 users in it you need to add the '-limit' flag, and set it to a number greater than your actual amount of users, e.g.
dsquery user "OU={your target OU},DC={your domain},DC={your domain extension}" -limit 2000 | dsmod user -pwdneverexpires yes
pwdneverexpire
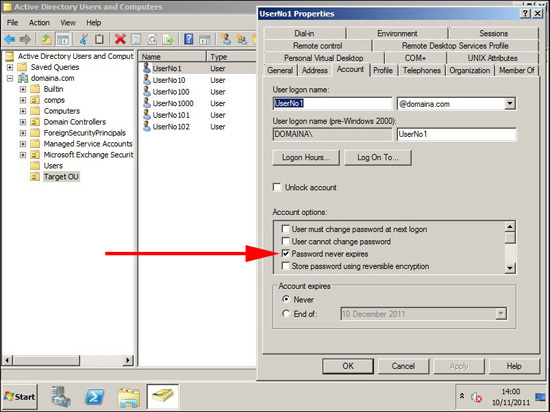
2. Now your users will have this option set.
password never expires

Bulk Export Users From One Domain, and Import Into Another


Step 1 Export Domain Users to CSV File

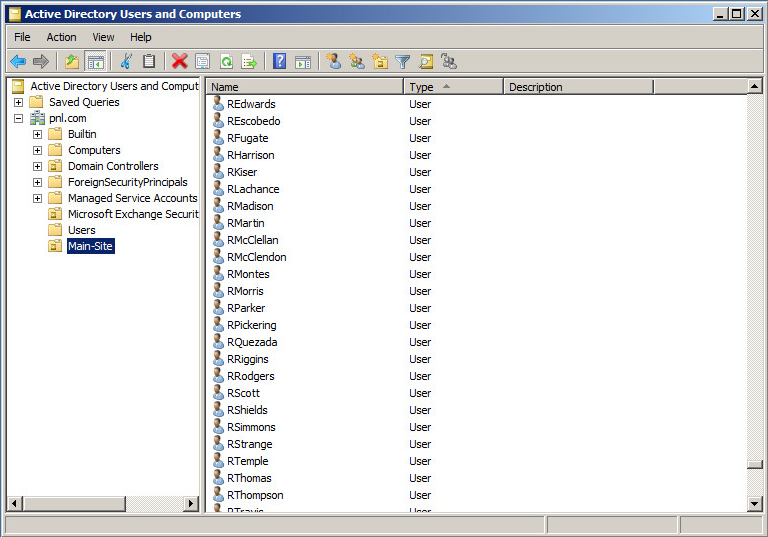
1. Here all my users are in one OU, if that OU has 'nested OU's within it that's OK.
Bulk Export Users
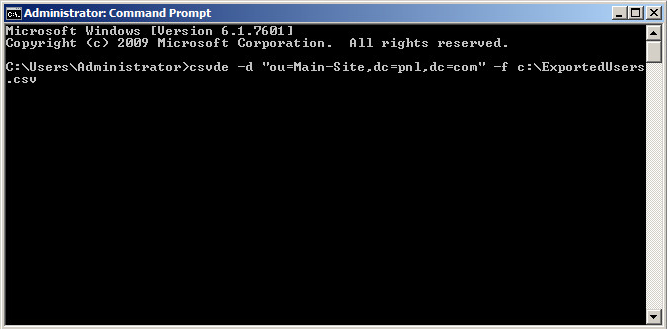
2. The command to 'export' is as follows;
Note: You need to 'run as administrator'
csvde -d {LDAP Path} -f c:\filename.csv
Example
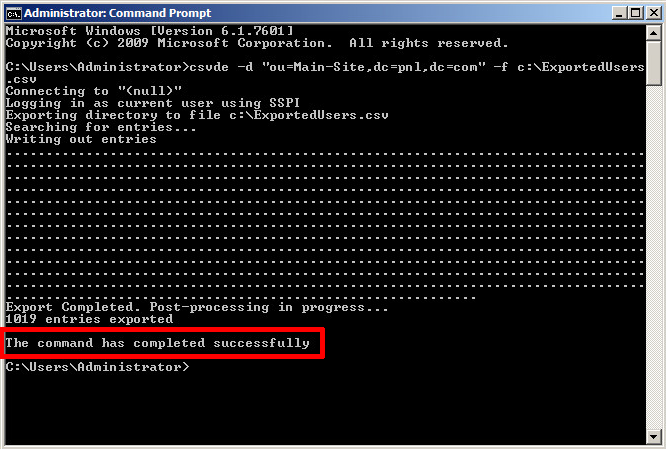
csvde -d "ou=Main-Site,dc=pnl,dc=com" -f C:\ExportedUsers.csv
Bulk Export Users CSVDE
3. The users will be exported. If it fails at this point it will give you a descriptive error, CSVDE has been around for a while, Google the error (most fixes are pretty simple).
CSVDE Export Users
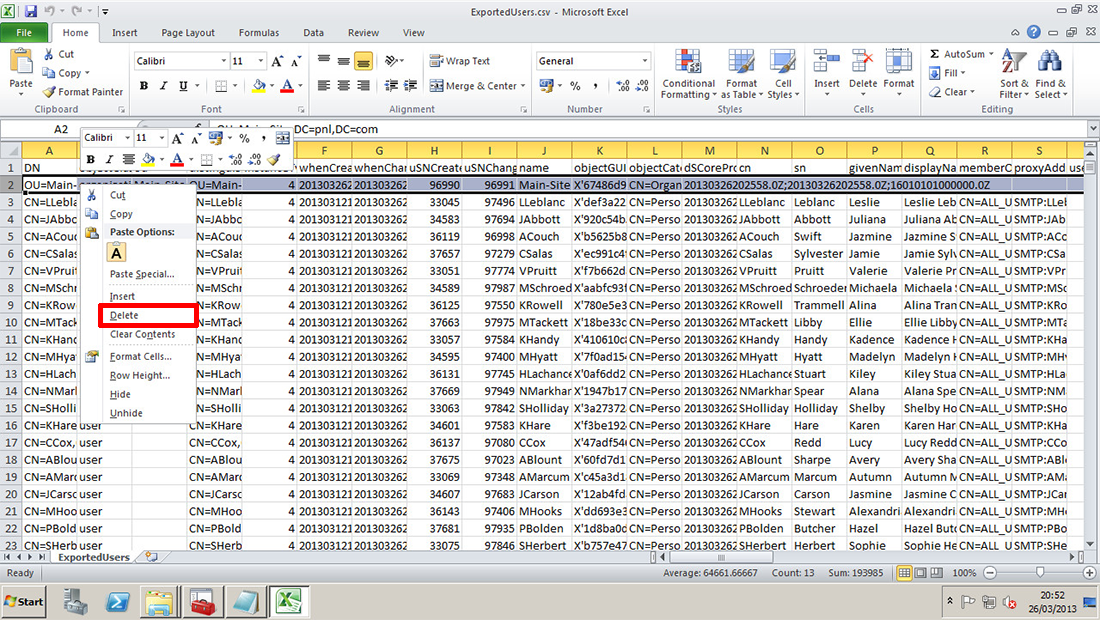
4. Now open the CSV File with Excel, the second line will probably be the OU, you can leave this here if you want but if your target OU is different (or Like me you prefer to create it manually), then delete row 2 (Don’t delete Row 1!).
Edit csv file
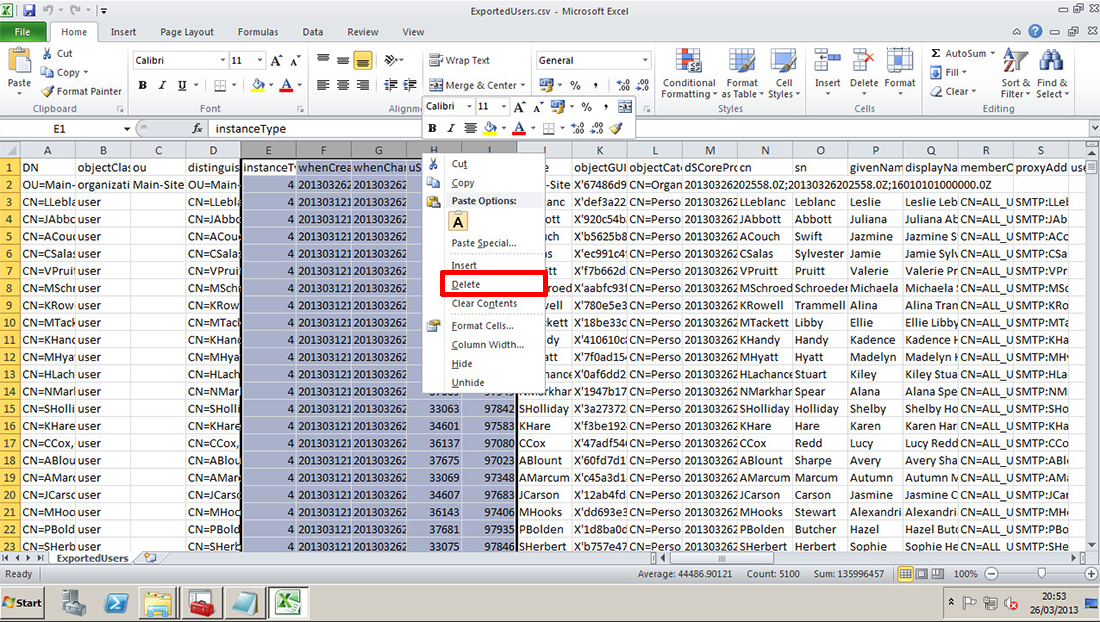
5. You do not need all the columns, delete all the columns EXCEPT,
DN
objectClass
ou
distinguishedName
name
cn
sn
givenName
displayName
sAMAccountName
userPrincipalName

Edit CSV for Bulk Import
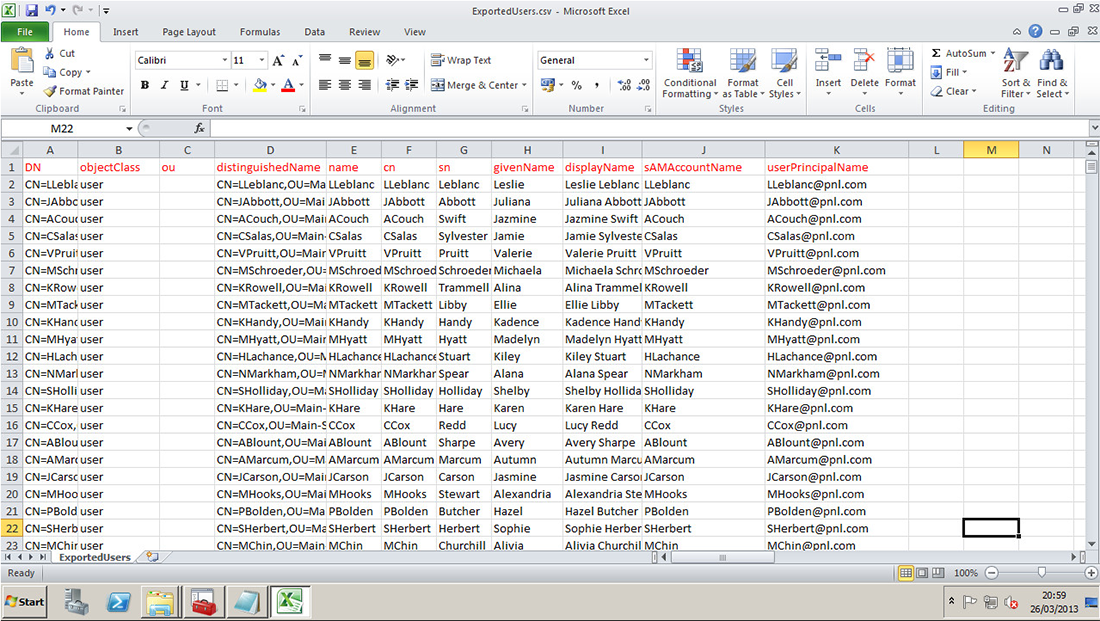
So when complete it should look like the following;
Complete CSV for CSVDE Active Directory
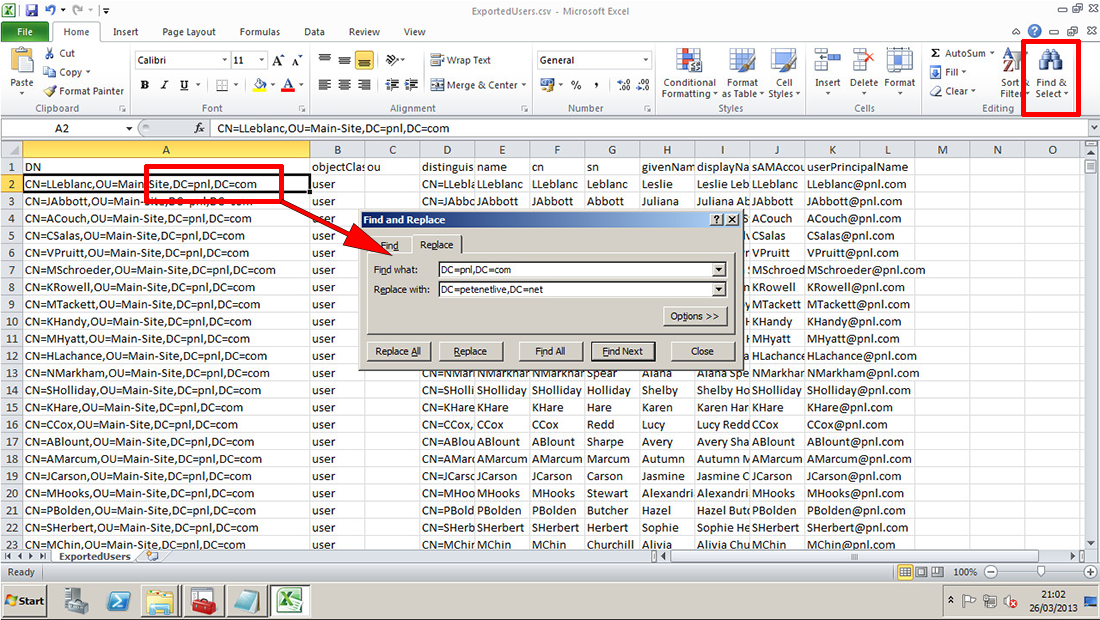
6. Change any details in the LDAP path that are different for the new domain.
CSV File find and replace
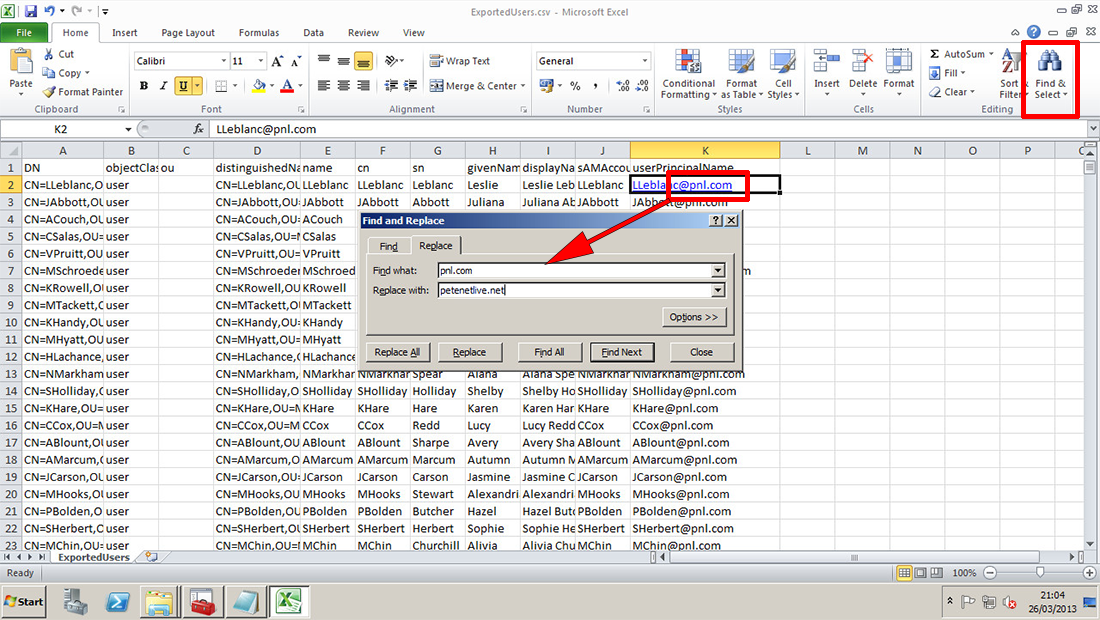
7. You may also need to change the domain name that's listed on the userPrincipleName.
CSVDE userprinciplename

Step 2 Import Domain Users from CSV File

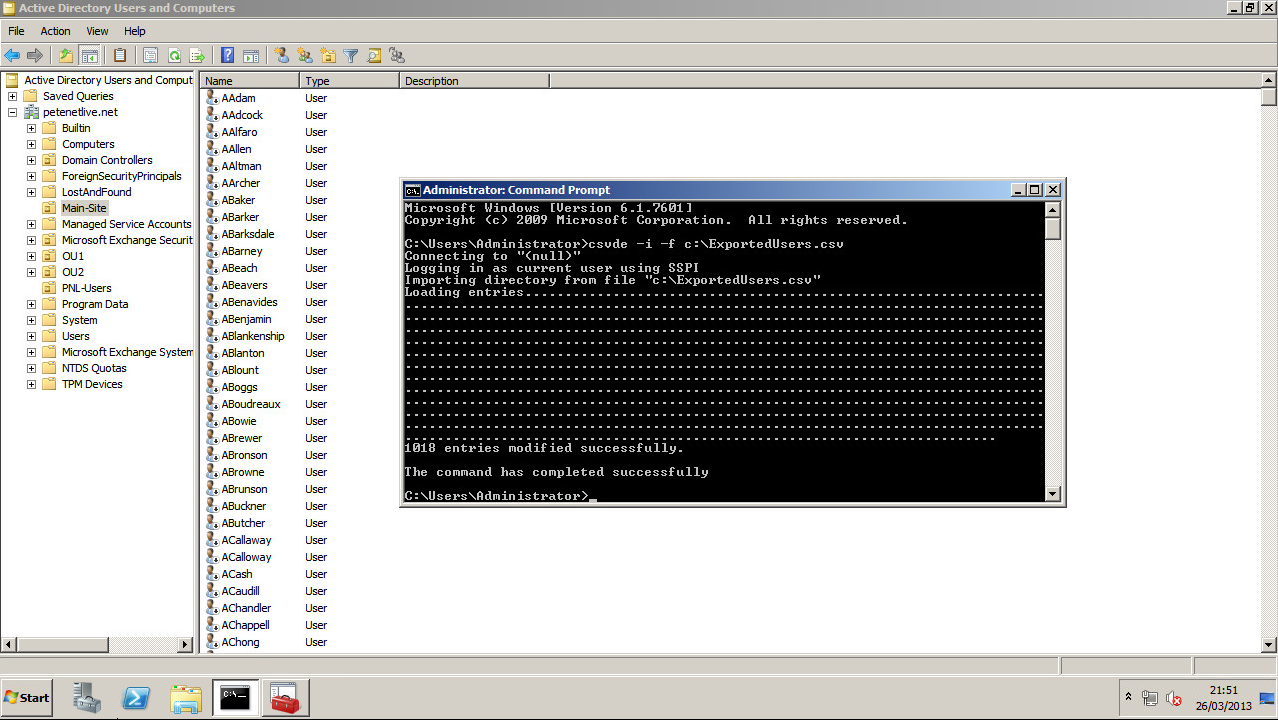
1. On the target domain, (if you are not importing the OU's, then make sure they already exist). The syntax for the import is;
csvde -i -f c:\filename.csv
Bulk Import Users
9. Your users should be imported.
Bulk Import Users CSVDE
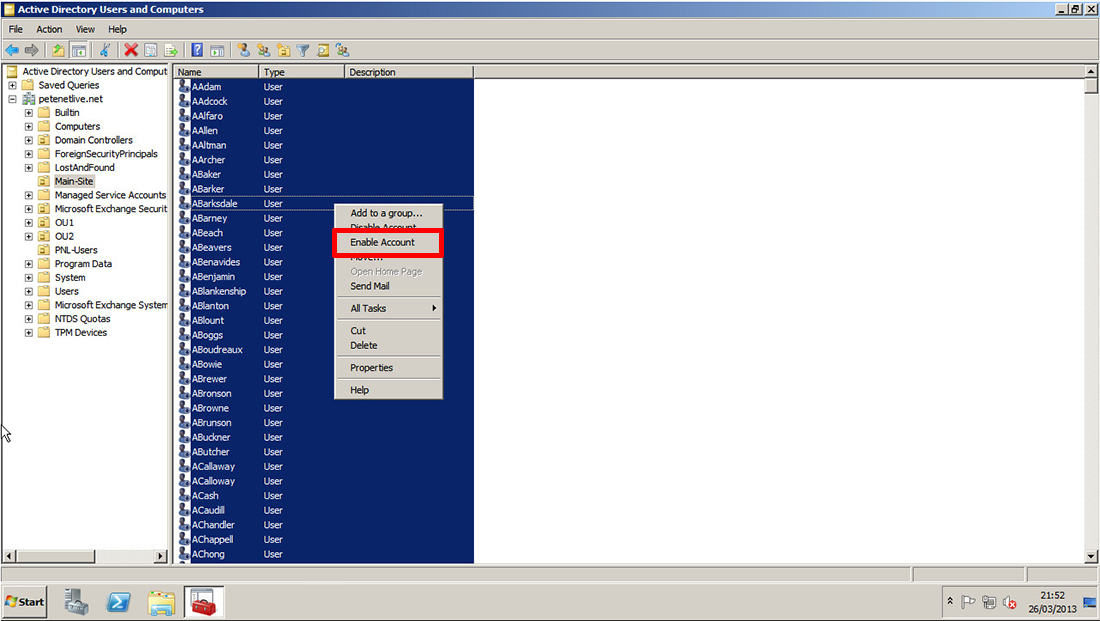
10. By default they will be disabled, but you can bulk enable them.
Bulk Enable Users
11. At this point all the users have no password, this can also be bulk set.
Windows - Reset all User Passwords in an OU